Miarmy Crowd Simulation Documentation (English)
Arnold Batch Render (Local Machine)
General
After the single frame render test, this part introduces how to setup batch render for rendering all the frames of the scene.
Instructions
Step 1
Arnold Single Frame Render and make sure everything fine
Step 2
Check on Export shader to ASS (if you dont want arnold render scene shaders)
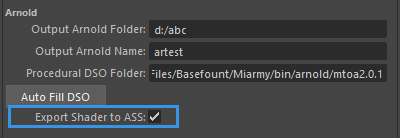
Export Shader to ASS
This option is determining whether we write all shaders into .ass file.
Once we enable it and export all .ass and when render, it won't read shaders in scene anymore, and we can entirely work with a pure stand-in node without bringing any Original agents in render/light department. But the shader cannot be modify after exporting.
If we don't check on this, the render will read the scene shaders, so we have to bring all shader holders from Original Agents to render scene and prevent any change on their names. While this can get benifit of modifying shaders, so that the lighting/rendering department can continue tweak the shader effects.
Enable This
Please enable this option if you want to make your render pipeline easier.
Step 3
Place all agents, make Agent Cache, then we can interactively drag back and forth the timeline.
Click Miarmy > RENDER > Arnold > Setup Scene Sequence
It will export render contents each frame.
After exporting, de-place your agents, goto any frame you want to render, and click render and test. Usually, we can try to render 2-3 frames.
Then submit to the local batch render by Maya menu Render > Batch Render

Basefount Technology